

Hey there! As a supplier of Hydraulic Cup Making Machines, I've seen firsthand how crucial it is to align the molds correctly. A misaligned mold can lead to a whole bunch of problems, like defective cups, wasted materials, and even machine breakdowns. So, in this blog post, I'm gonna share some tips on how to align the molds correctly in a Hydraulic Cup Making Machine.
Understanding the Basics of Mold Alignment
Before we dive into the alignment process, let's quickly go over the basics. In a Hydraulic Cup Making Machine, the molds are used to shape the plastic sheets into cups. The upper and lower molds need to be perfectly aligned to ensure that the cups are formed correctly. If the molds are misaligned, the cups may have uneven walls, rough edges, or other defects.
Pre - alignment Checks
First things first, you gotta do some pre - alignment checks. Make sure the machine is turned off and unplugged to avoid any accidents. Start by inspecting the molds for any signs of damage or wear. Look for cracks, chips, or any other issues that could affect the alignment. If you find any problems, replace the damaged parts immediately.
Next, clean the molds thoroughly. Use a soft brush and a mild cleaning solution to remove any dirt, debris, or plastic residue. A clean mold will not only make the alignment process easier but also improve the quality of the cups.
Tools You'll Need
To align the molds correctly, you'll need a few tools. These include a feeler gauge, a straightedge, and a set of wrenches. The feeler gauge is used to measure the gap between the upper and lower molds, the straightedge helps you check if the molds are straight, and the wrenches are for tightening or loosening the bolts that hold the molds in place.
Step - by - Step Alignment Process
Step 1: Initial Positioning
Place the upper and lower molds in their designated positions on the machine. Make sure they are centered as best as you can by eye. This is just a rough positioning, and we'll fine - tune it later.
Step 2: Checking Parallelism
Use the straightedge to check if the upper and lower molds are parallel to each other. Place the straightedge across the surface of the molds and look for any gaps. If you notice a gap at one end, it means the molds are not parallel. You'll need to adjust the mounting bolts to correct this. Loosen the bolts on the side with the larger gap and tighten the ones on the opposite side until the molds are parallel.
Step 3: Measuring the Gap
Once the molds are parallel, use the feeler gauge to measure the gap between them. The gap should be uniform across the entire surface of the molds. A non - uniform gap can cause uneven pressure during the cup - forming process, leading to defective cups.
If the gap is too large in one area, loosen the bolts on that side and tighten the ones on the opposite side to reduce the gap. Keep checking the gap with the feeler gauge until it is uniform.
Step 4: Fine - Tuning
After getting the parallelism and the gap right, do a final fine - tuning. Start the machine and run a test cycle with a scrap plastic sheet. Check the formed cups for any signs of misalignment, such as uneven walls or rough edges. If you find any issues, make small adjustments to the molds and run another test cycle until the cups are forming correctly.
Importance of Regular Maintenance
Aligning the molds correctly is not a one - time thing. You need to do regular maintenance to ensure that the molds stay aligned. This includes daily visual inspections, monthly in - depth checks, and annual professional servicing.
Regular maintenance can help you catch any alignment issues early on, preventing costly repairs and production delays. It also extends the lifespan of the molds and the machine as a whole.
The Impact of Correct Mold Alignment on Production
When the molds are aligned correctly, you'll notice a significant improvement in the quality of the cups. The cups will have uniform walls, smooth edges, and a consistent shape. This not only makes the cups more appealing to customers but also reduces the number of defective products.
Correct mold alignment also increases the efficiency of the machine. The cups are formed more quickly and with less waste, which means higher production rates and lower costs.

Related Machines
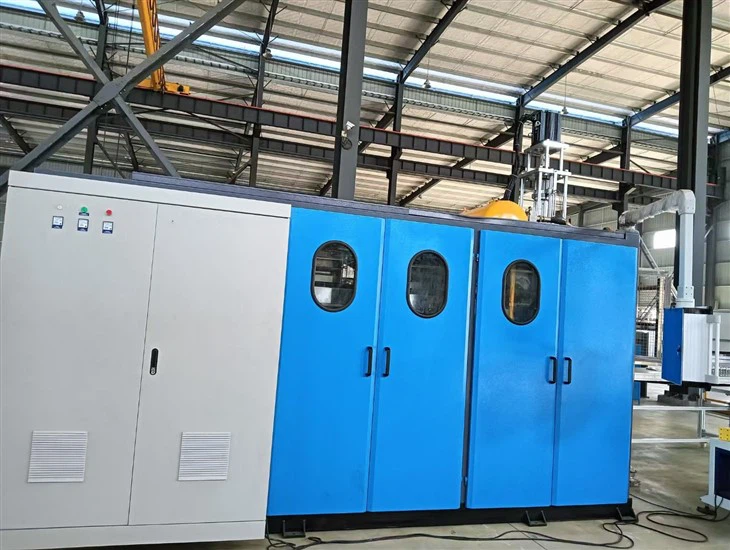
If you're in the market for a cup - making machine, we offer a range of options. Check out our Hydraulic Cup Forming Machine, which is a great choice for high - volume production. We also have the Disposable Plastic Cup Thermoforming Machine and the Automatic Plastic Cup Thermoforming Machine, both of which are designed to meet different production needs.
Contact Us for More Information
If you have any questions about aligning the molds in a Hydraulic Cup Making Machine or if you're interested in purchasing one of our machines, don't hesitate to reach out. We're here to help you get the most out of your cup - making production. Whether you're a small - scale business just starting out or a large - scale manufacturer looking to upgrade, we have the right solution for you.
References
- Industry Best Practices for Plastic Cup Manufacturing
- Hydraulic Cup Making Machine User Manual
So, that's all about how to align the molds correctly in a Hydraulic Cup Making Machine. I hope you found this blog post helpful. If you have any tips or experiences to share, feel free to leave a comment below.


